1. Character Class
ACharacter는 APawn을 상속받기 때문에 Pawn,Actor의 모든 기능을 사용할 수 있다
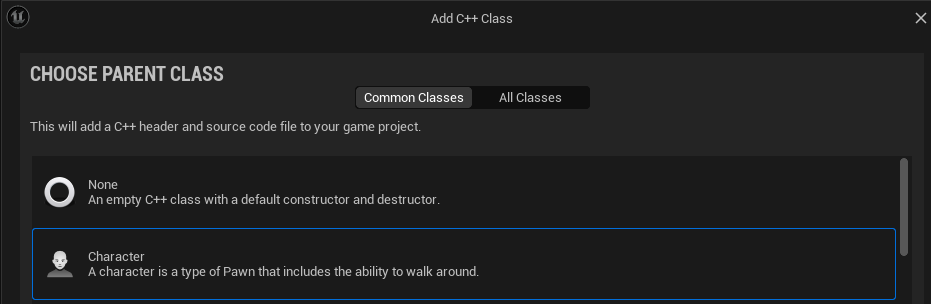
Class 생성 시 ACharacter를 부모 클래스로 지정하여 Character클래스를 생성할 수 있다

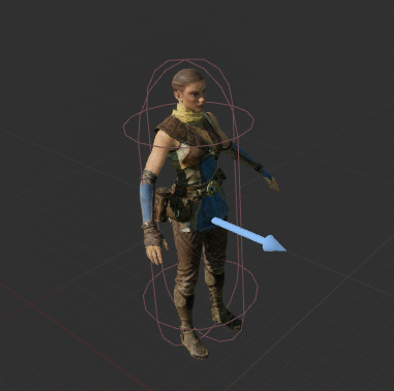
ACharacter클래스를 부모클래스로 BP클래스를 만들게 되면 APawn과 다르게 CapsuleComponent, Arrow Component, MeshComponent, CharacterMoveComponent가 Default로 생성되게 된다
ArrowComponent는 방향을 알려주는 Component이다 (전방 방향인 X축을 바라본다)
CapsuleComponent는 ACharacter의 RootComponent로 지정되어 있다 (ACharacter클래스에 존재한다)
CharacterMoveComponent는 APawn의 FloatingPawnMovement와 비슷하지만 휴머노이드 캐릭터를 위한 기능이 더 추가되어 있다
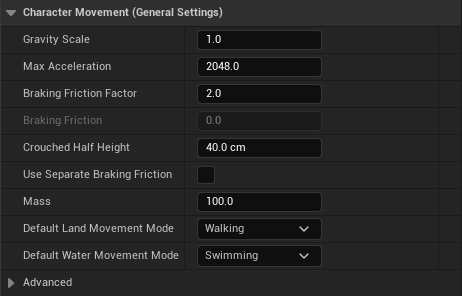
Gravity Scale (중력), Max Acceleration (최대 가속도). Breaking Friction Factor (제동 마찰력) 등 Character의 움직임에 관련된 기능들이 추가되어 있다
ACharacter의 Mesh는 SkeletalMeshComponent이다 (ACharacter에 존재)
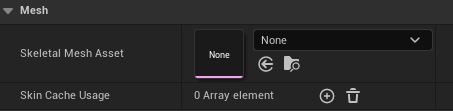
원하는 Skeletal Mesh Asset을 지정하여 적용할 수 있다
SkeletalMesh의 Animation 탭에서 원하는 애니메이션을 적용시킬 수 있다 (AnimBP or AnimAsset)

2. Character Movement & Looking (Enhanced Input)
Pawn과 마찬가지로 이제 기존의 Axis Input은 UE에서 Deprecated되었기 때문에 Enhanced Input을 사용하여 Character의 Movement를 제어한다
InputAction을 만들고 Value Type은 Axis2D(Vector2D)로 지정한다

InputMappingContext를 만들고 Key Mapping을 해준다 (WASD)
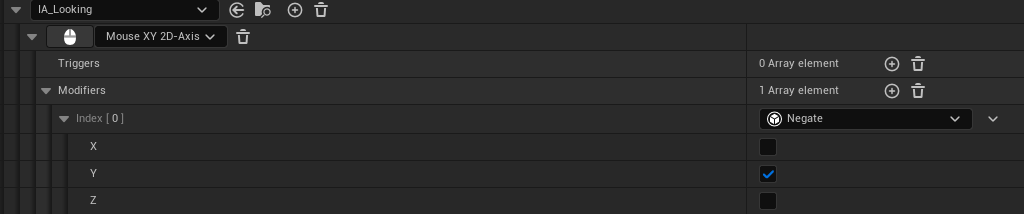
이때 A는 음수값이 필요하므로 Modifiers-Negate를 추가해주어 축 입력시 음수 value를 받아오게 해주어야 한다

D,A는 X축 방향이기 때문에 상관없지만 W,S는 Y축 방향이기 때문에 Modifiers-Swizzle Input Axis Values를 추가 후 YXZ로 Input Axis 우선 순위를 변경해주어야 한다 (S는 Negate도 추가해야 함)

이제 C++에서 InputAction, InputMappingContext 변수를 만들어야 한다
class STUDYUE_API ASlashCharacter : public ACharacter
{
	GENERATED_BODY()

public:
	ASlashCharacter();

	virtual void Tick(float DeltaTime) override;

	virtual void SetupPlayerInputComponent(class UInputComponent* PlayerInputComponent) override;

protected:
	virtual void BeginPlay() override;

	UPROPERTY(EditAnywhere, Category = Input)
	UInputMappingContext* SlashContext;

	UPROPERTY(EditAnywhere, Category = Input)
	UInputAction* MovementAction;
};
BeginPlay()에서 UEnhancedInputLocalPlayerSubsystem에 AddMappingContext()로 만든 UInputMappingContext를 Add해준다
void ASlashCharacter::BeginPlay()
{
	Super::BeginPlay();

	APlayerController* PlayerController = Cast<APlayerController>(GetController());

	if (PlayerController)
	{
		UEnhancedInputLocalPlayerSubsystem* Subsystem = ULocalPlayer::GetSubsystem<UEnhancedInputLocalPlayerSubsystem>(PlayerController->GetLocalPlayer());

		if (Subsystem)
		{
			Subsystem->AddMappingContext(SlashContext, 0);
		}
	}
}
이제 Bind할 함수를 만들어 준다
void Move(const FInputActionValue& Value);
void ASlashCharacter::Move(const FInputActionValue& Value)
{
	const FVector2D MovementVector = Value.Get<FVector2D>();

	const FRotator Rotation = Controller->GetControlRotation();
	const FRotator YawRotation = FRotator(0.f, Rotation.Yaw, 0.f);

	const FVector ForwardDirection = FRotationMatrix(YawRotation).GetUnitAxis(EAxis::X);
	const FVector RightDirection = FRotationMatrix(YawRotation).GetUnitAxis(EAxis::Y);

	AddMovementInput(ForwardDirection, MovementVector.X);
	AddMovementInput(RightDirection, MovementVector.Y);
}
GetControlRotation() : Possesed된 Controller의 회전값을 FRotator로 반환한다
FRotationMatrix() : input으로 들어간 FRotator를 기준으로 한 회전행렬을 만들어준다
원하는 회전값 (FRotator)을 인자로 가진다
GetUnitAxis() : 행렬을 기준으로 원하는 방향 단위 Vector를 반환한다
원하는 방향값 (EAxis)을 인자로 가진다
(단순히 ActorForwardVector를 이용하지 않는 이유는 Character를 화면을 돌렸을 때의 전방 방향으로 이동시키기 위해서다)
마무리로 SetupPlayerInputComponent에서 UEnhancedInputComponent->BindAction()으로 만든 함수를 Bind해준다
void ASlashCharacter::SetupPlayerInputComponent(UInputComponent* PlayerInputComponent)
{
	Super::SetupPlayerInputComponent(PlayerInputComponent);

	if (UEnhancedInputComponent* EnhancedInputComponent = CastChecked<UEnhancedInputComponent>(PlayerInputComponent))
	{
		EnhancedInputComponent->BindAction(MovementAction, ETriggerEvent::Triggered, this, &ASlashCharacter::Move);
	}
}
Looking도 마찬가지의 과정을 거쳐 InputAction을 만들고 InputMappingContext에 추가해준다
이제 같은 방식으로 InputAction 변수 선언, 함수제작, SetupPlayerInputComponent에서 만든 함수를 BindAction을 해준다
void ASlashCharacter::Look(const FInputActionValue& Value)
{
	const FVector2D LookAxisVector = Value.Get<FVector2D>();

	AddControllerPitchInput(-LookAxisVector.Y);
	AddControllerYawInput(LookAxisVector.X);
}
void ASlashCharacter::SetupPlayerInputComponent(UInputComponent* PlayerInputComponent)
{
Super::SetupPlayerInputComponent(PlayerInputComponent);
if (UEnhancedInputComponent* EnhancedInputComponent = CastChecked<UEnhancedInputComponent>(PlayerInputComponent))
{
EnhancedInputComponent->BindAction(MovementAction, ETriggerEvent::Triggered, this, &ASlashCharacter::Move);
EnhancedInputComponent->BindAction(LookingAction, ETriggerEvent::Triggered, this, &ASlashCharacter::Look);
}
}
ACharacter클래스는 bUseControllerRotationYaw가 default로 true로 되어있다
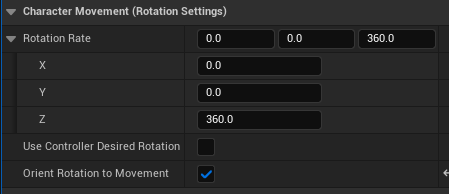
이때 이동에 맞게 Character를 회전하고 싶다면 bUseControllerRotationYaw를 false로 설정하고 OrientRotationToMovement를 True로 해주면 된다
추가로 마우스 회전 시 Character를 같이 회전 시키고 싶다면 bUseControllerDesiredRotation을 True 로 해주면 된다
회전의 속도는 RotationRate 값으로 제어가 가능하다
C++에서는 다음과 같이 가능하다
GetCharacterMovement()->bOrientRotationToMovement = true;

GetCharacterMovement()->RotationRate = FRotator(0.f, 360.f, 0.f);
RotationRate에 넣어준 FRotator의 Yaw값이 클 수록 빨리 회전한다
마지막으로 Pawn과 마찬가지로 Camera&SpringArm으로 원하는 CameraView를 지정해서 사용하면 된다
'Unreal' 카테고리의 다른 글
| 14. The Character Class & Hair And Eyebrows (214) | 2024.01.13 |
|---|---|
| 13. RotationMatrix (173) | 2024.01.12 |
| 11. The Pawn Class & Camera/Spring Arm & Enhanced Input System (3) (82) | 2024.01.03 |
| 10. The Pawn Class & Enhanced Input System (2) (28) | 2024.01.03 |
| 9. The Pawn Class & Enhanced Input System (1) (67) | 2024.01.03 |